Some individuals using Mac computers often have trouble with the standard QWERTY keyboard layout. An accessible alternative built-in to your Mac is the Dvorak layout, which puts the most frequently used keys right under your fingers, so you type with less finger movements needed. So would the Dvorak keyboard layout benefit you?
First, according to ATMac, if you use “‘hunt and peck’ typing” it won’t be very helpful for you. The Dvorak layout’s benefits are really only for users who “touch type–but learning to touch type is part of the switching so it doesn’t matter whether you touch-type in QWERTY, only whether you can do it in Dvorak mode.”
Further, this keyboard layout may be good for individuals with repetitive strain injury or other pain conditions, or individuals who get fatigued easily. There are four types of Dvorak layouts available on the Mac:
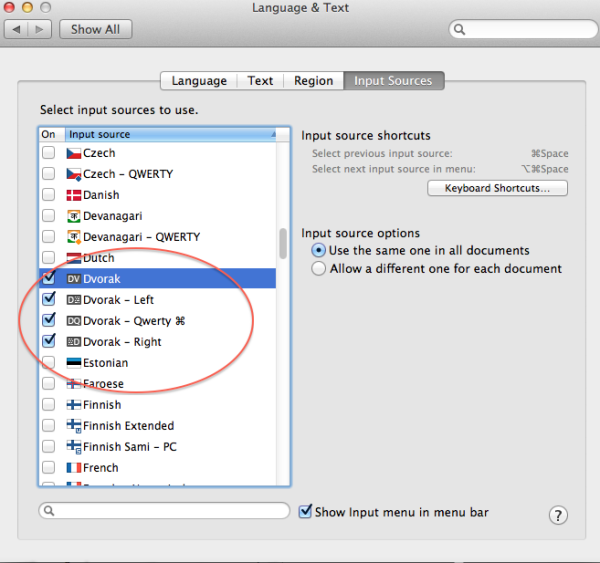
- Dvorak: The standard Dvorak layout
- Dvorak Left: Puts the most used keys under your left hand
- Dvorak Right: Puts the most used keys under your right hand
- Dvorak QWERTY ⌘: Switches back to QWERTY while you hold down the Command (⌘) key.
If you want to switch your keyboard layout to Dvorak using Mac OS X, follow these step-by-step instructions:
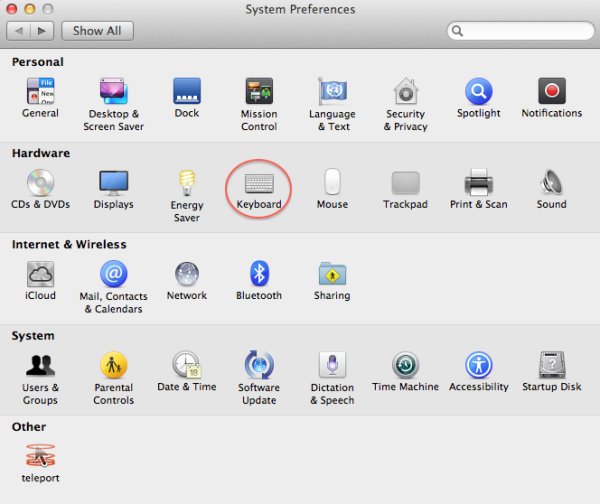
1. Open your System Preferences and select Keyboard.

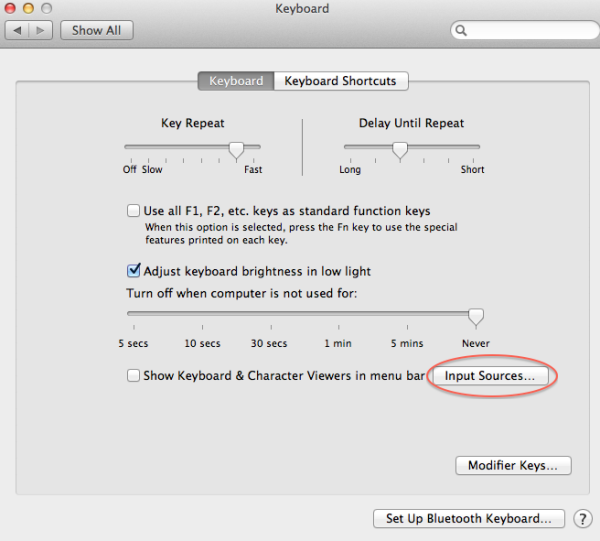
2. Once you’re in the Keyboard settings, select Input Sources near the bottom right.

3. Next, you’ll be provided with several keyboard options. Scroll until you find the Dvorak layout options like so:

4. Optional: I recommend you check the box next to the “Show input menu in menu bar” (see above image) so you can easily switch between keyboards from your menu bar.
Tips for switching to the Dvorak keyboard layout:
Once you’ve set up the Dvorak keyboard layout, you’re ready to begin training. ATMac has provided a great resource to make the transition easier, a printout of the Dvorak keyboard.
Something that helped me greatly when I was learning was printing out a picture of the keyboard layout, colour-coding it to show which finger hits which keys, and attaching it to the top of the monitor so I could see it easily—that way I learned to look up to check my finger placement rather than looking down at the keyboard and my fingers. Dvorak is a layout designed for touch-typing without watching your fingers, so this helps you get into good habits.
ATMac provided some printable Dvorak keyboard layouts, some color-coded and some blank. Check out the links under “Step 2: Getting Ready to Switch” of this article to view the layouts.
The author of the article advised when switching to Dvorak, the easiest way to learn it is through a typing tutor program. Here are a few available options:
- Dvorak keyboard training, which is a free online resource
- Type Fu, an app in the Mac App Store (costs $14.99)
- The Typing Cat, another free online resource
To learn more about the Dvorak layout and the benefits of using it, be sure to read the whole article by ATMac here.

doodle jump is not just about jumping on platforms but also requires you to skillfully use items and dodge monsters to survive longer.